Prepare EAS proxy for migration
If you’re using the Sophos Mobile EAS proxy, we recommend that you temporarily turn off mail filtering until you’ve configured the standalone EAS proxy for Sophos Central. Otherwise, devices that are already migrated would be blocked.
Warning
For an on-premise Sophos Mobile server, turning off mail filtering affects all customers, not only the customer that you migrate to Sophos Central.
To turn off mail filtering, follow the steps for your EAS proxy type (internal, standalone, or standalone in PowerShell mode).
Turn off mail filtering for the internal EAS proxy
You must start the migration assistant described in Run the migration assistant before you can perform the following steps. The Allow all devices setting is only then available.
Do as follows:
- Sign in to Sophos Mobile Admin as a super administrator.
- On the menu sidebar, under SETTINGS, click Setup > Sophos setup, and then click the EAS proxy tab.
- Under Internal, select Allow all devices.
- Click Save.

Turn off mail filtering for the standalone EAS proxy in proxy mode
Do as follows:
-
Open the EAS proxy’s configuration file,
easproxy.conf.xml, in a text editor.The file is located in the installation folder. By default, this is
C:\Program Files (x86)\Sophos\Sophos Mobile EAS Proxy\. -
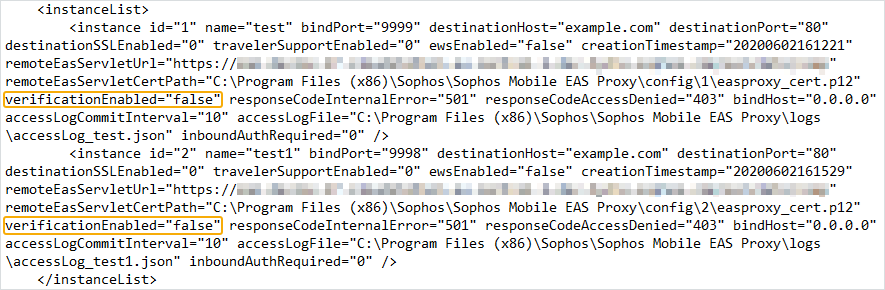
Change all occurrences of the text
verificationEnabled="true"toverificationEnabled="false".There’s one occurrence for each EAS proxy instance that you’ve set up.
-
Save the file.
-
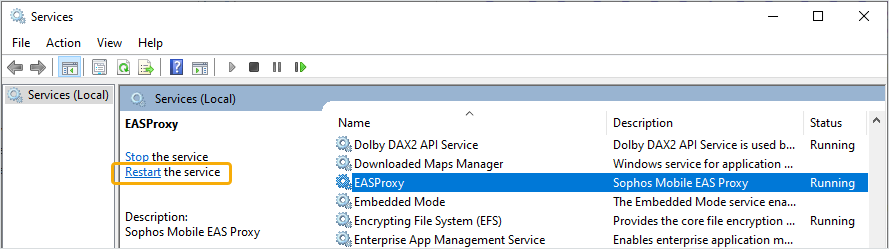
In Windows, open Services and restart the EASProxy service.
Turn off mail filtering for the standalone EAS proxy in PowerShell mode
Do as follows:
-
Connect to Exchange Online PowerShell or, if you have an Exchange server, open the Exchange Management Shell.
See the Microsoft documents Connect to Exchange Online PowerShell and Open the Exchange Management Shell.
-
Run the following command:
Get-ActiveSyncOrganizationSettingsRecord the
DefaultAccessLevelvalue. You need this value when you turn on mail filtering again. -
Run the following command:
Set-ActiveSyncOrganizationSettings -DefaultAccessLevel allow