Configure IPsec remote access VPN with Sophos Connect client
You can configure IPsec remote access connections. Users can establish the connection using the Sophos Connect client.
Introduction
To configure and establish IPsec remote access connections over the Sophos Connect client, do as follows:
- Optional: Generate a locally-signed certificate.
- Configure the IPsec remote access connection.
- Send the configuration file to users.
- Optional: Assign a static IP address to a user
- Add a firewall rule.
- Allow access to services.
- Send the Sophos Connect client to users. Alternatively, users can download it from the user portal.
Users must do as follows:
- Install the Sophos Connect client on their endpoint devices.
- Import the configuration file into the client and establish the connection.
Note
IPsec remote access VPN doesn't support connections from the LAN zone.
Configure a locally-signed certificate
- Go to Certificates > Certificates and click Add.
-
Select Generate locally-signed certificate.
Alternatively, you can select Upload certificate if you have one.

-
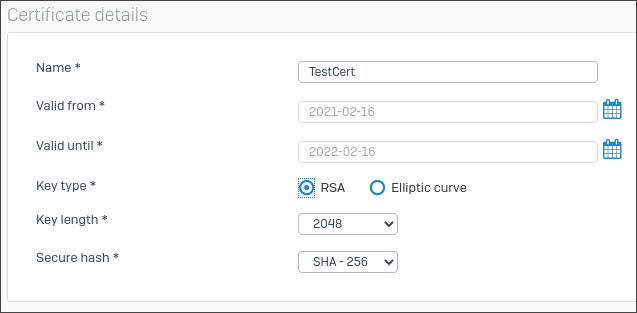
Specify the Certificate details for the locally-signed certificate.
Here's an example:
-
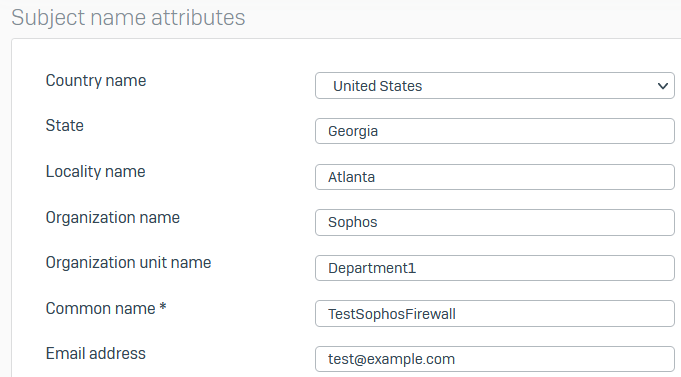
Specify the Subject Name attributes.
Here's an example:
-
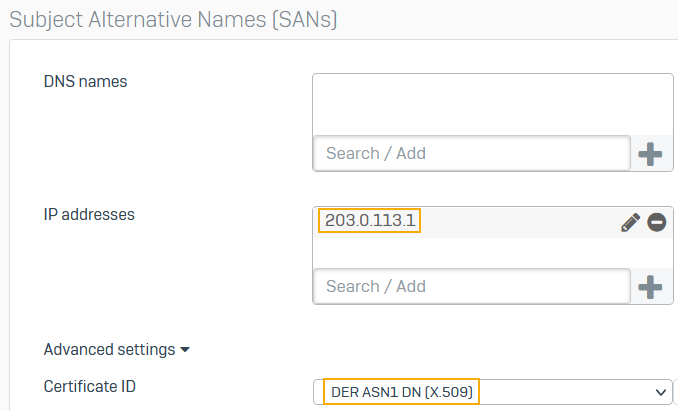
Under Subject Alternative Names, enter a DNS name or IP address and click the add (+) button.
Here's an example:
Configure remote access IPsec
Specify the settings for IPsec remote access connections.
- Go to Remote access VPN > IPsec and click Enable.
-
Specify the general settings.
Name Example settings Interface 203.0.113.1Select a WAN port.
IPsec profile DefaultRemoteAccessYou can only select IKEv1 profiles with Dead Peer Detection (DPD) turned off or set to Disconnect.
Authentication type Digital certificateLocal certificate Appliance certificateRemote certificate TestCertSelect a locally-signed certificate. Alternatively, select a certificate you've uploaded to Certificates > Certificates.
Local ID The firewall automatically selects the local ID for digital certificates.
Make sure you've configured a certificate ID for the certificate.
Remote ID Make sure you've configured a certificate ID for the certificate. Allowed users and groups TestGroup -
Specify the client information.
Here's an example:
Name Example settings Name TestRemoteAccessVPNAssign IP from 192.168.1.11192.168.1.254DNS server 1 192.168.1.5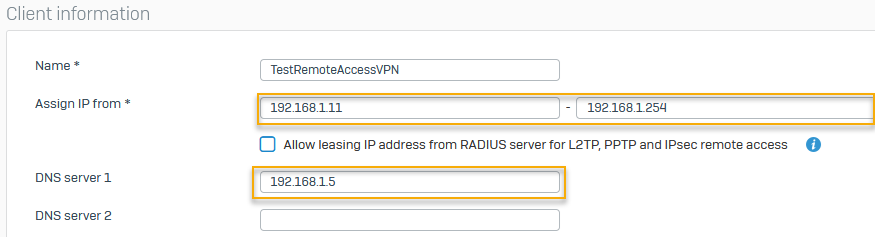
-
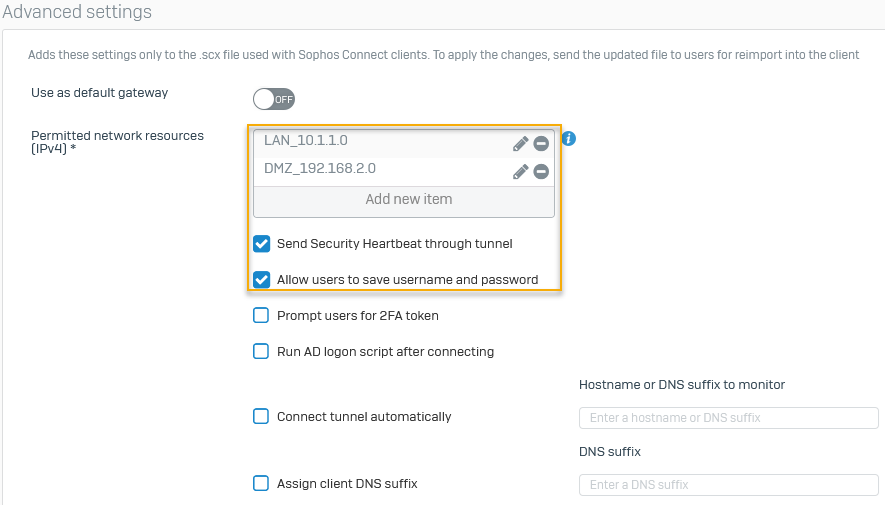
Specify the advanced settings you want and click Apply.
Name Example settings Permitted network resources (IPv4) LAN_10.1.1.0DMZ_192.168.2.0Send Security Heartbeat through tunnel Sends the Security Heartbeat of remote clients through the tunnel. Allow users to save username and password Users can save their credentials. Here's an example:
-
Click Export connection at the bottom of the page.
The exported
tar.gzfile contains a.scxfile and a.tgbfile.
-
Send the
.scxfile to users. - Optionally, download the client and send it to users.
Optional: Assign a static IP address to a user
To assign a static IP address to a user connecting through the Sophos Connect client, do as follows:
- Go to Authentication > Users, and select the user.
-
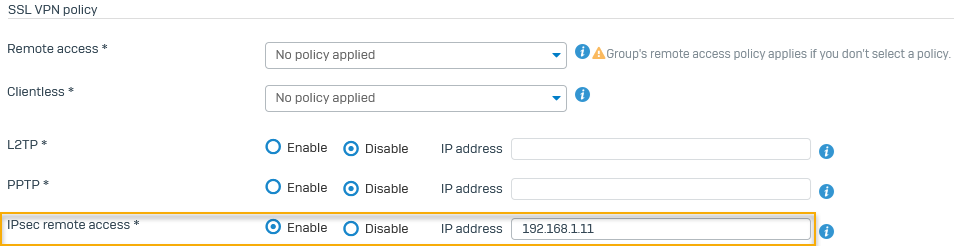
On the user's settings page, go down to IPsec remote access, click Enable, and enter an IP address.
Here's an example:
Add a firewall rule
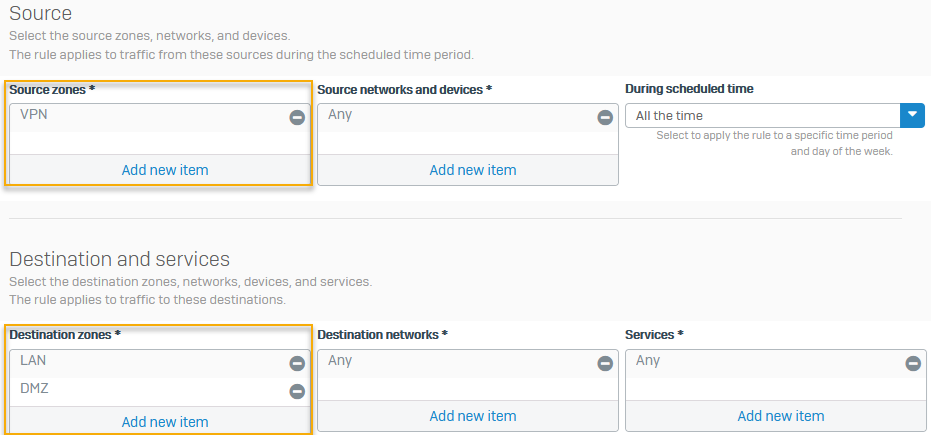
Configure a firewall rule to allow traffic from VPN to LAN and DMZ since you want to allow remote users to access these zones in this example.
- Enter a name.
-
Specify the source and destination zones as follows and click Apply:
Name Example settings Source zones VPNDestination zones LANDMZHere's an example:
Note
Under advanced settings for IPsec (remote access), if you select Use as default gateway, the Sophos Connect client sends all traffic, including traffic to the internet, from the remote user through the tunnel. To allow this traffic, you must additionally set the Destination zone to WAN in the firewall rule.
Allow access to services
You must allow access to services, such as the user portal and ping from VPN.
- Go to Administration > Device access.
-
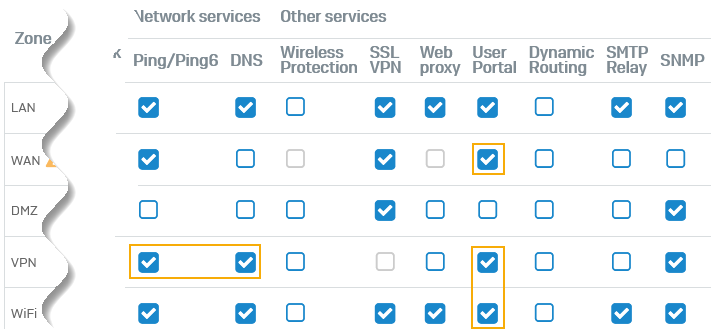
Select the checkbox under User portal for the following:
- WAN
- Wi-Fi
This allows users to sign in to the user portal and download the Sophos Connect client. We recommend that you only allow temporary access from the WAN.
-
Select the checkboxes for VPN under the following:
- User portal: Allows remote users to access the user portal through VPN.
- Optional: DNS: Allows remote users to resolve domain names through VPN if you've specified DNS resolution through the firewall.
- Optional: Ping/Ping6: Allows remote users to check VPN connectivity with the firewall.
-
Click Apply.
Configure Sophos Connect client on endpoint devices
Users must install the Sophos Connect client on their endpoint devices and import the .scx file to the client.
You can download the Sophos Connect client installers from the Sophos Firewall web admin console and share these with users.
Alternatively, users can download the Sophos Connect client from the user portal as follows:
- Sign in to the user portal.
- Click VPN.
-
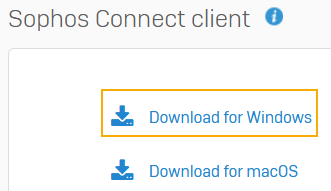
Under Sophos Connect client, click one of the following options:
- Download for Windows
- Download for macOS
-
Click the downloaded Sophos Connect client.
You can then see it in the system tray of your endpoint device.
-
Click the three dots button in the upper-right corner, click Import connection, and select the
.scxfile your administrator has sent.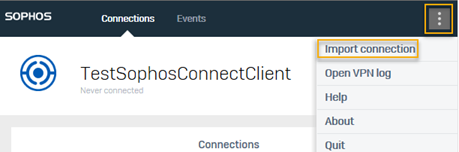
-
Sign in using your user portal credentials.
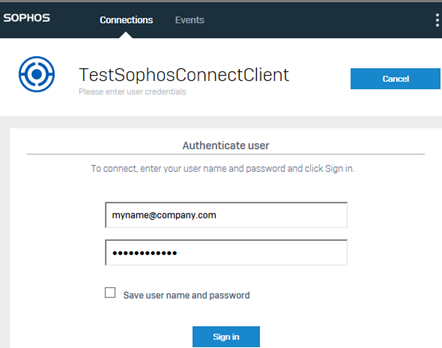
-
Enter the verification code if two-factor authentication is required.
IPsec remote access connection will be established between the client and Sophos Firewall.