Create a campaign
Start a new campaign to test your users with an attack simulation or enroll them in mandatory training.
You can create campaigns from existing templates. You can also customize these templates to suit your organization and your users.
To create a campaign, do as follows:
- Go to My Products > Phish Threat > Campaigns. See Campaign overview.
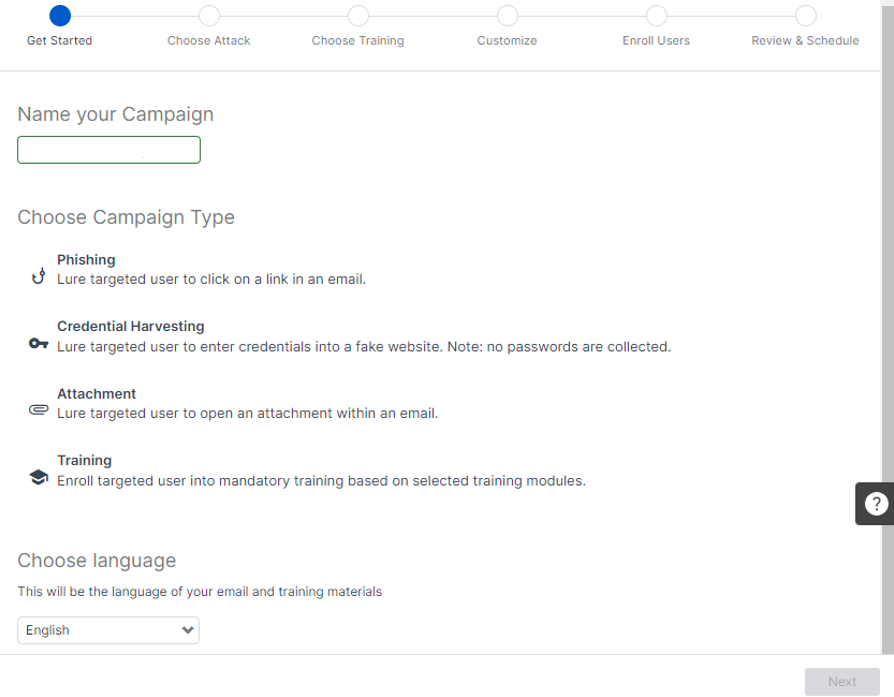
- Click New Campaign and enter a campaign name.
- Select a campaign type. See Campaign type.
- Select the language for the email template and training modules.
-
Click Next.
-
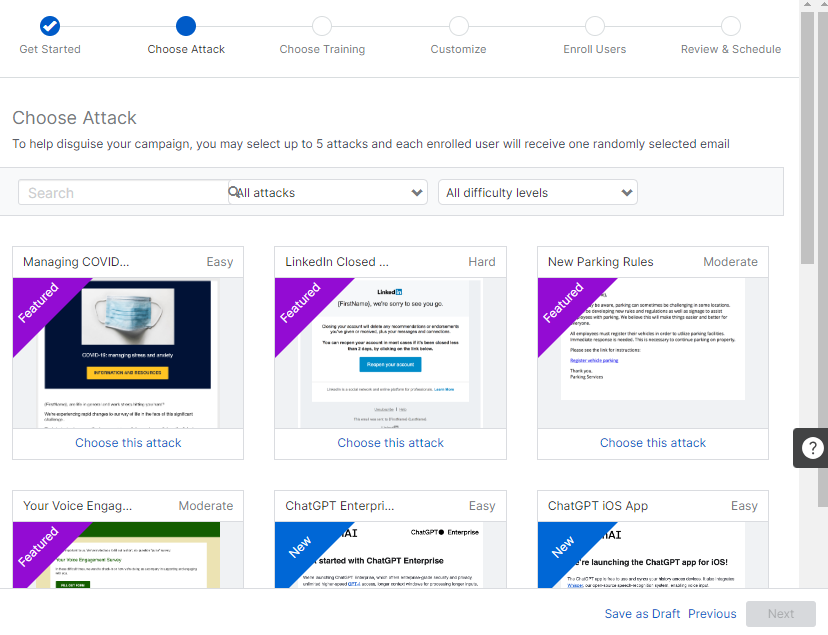
In Choose Attack, do as follows:
-
Click Choose this attack. You can choose up to five attacks for a campaign.
You can filter the attacks by difficulty level or by type.
-
Click Next.
-
-
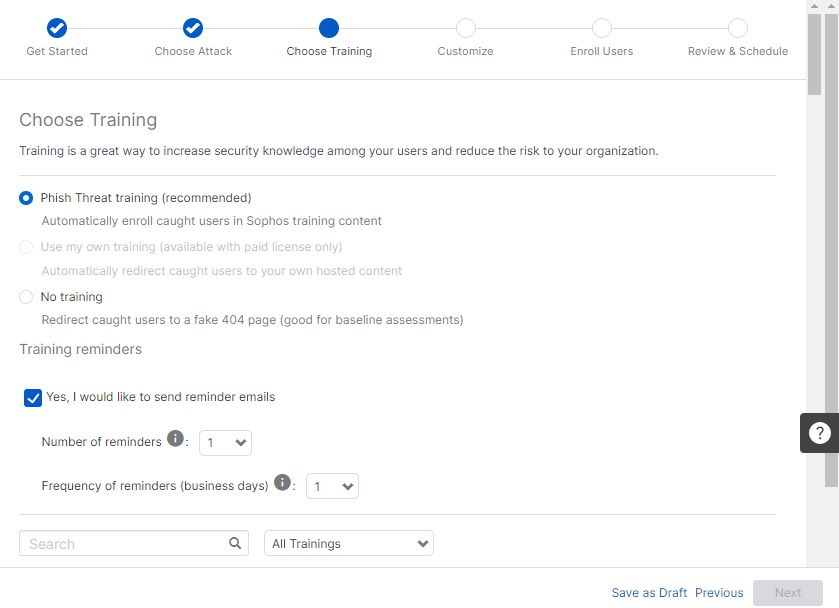
In Choose Training, do as follows:
-
Select a training course for users who fail the simulated attack.
We recommend you select the Phish Threat training.
You can filter the training course by HTML or Video type.
-
Send reminder emails to encourage users to take training courses.
You can set the number and frequency of the reminder emails. See Training reminder email intervals.
-
Click Next.
-
-
In Customize, do as follows:
-
Customize campaign elements for your organization and your users.
The elements you can customize differ depending on the attack type and whether you're enrolling users on training courses after failing tests. See Customize.
-
Click Next.
-
-
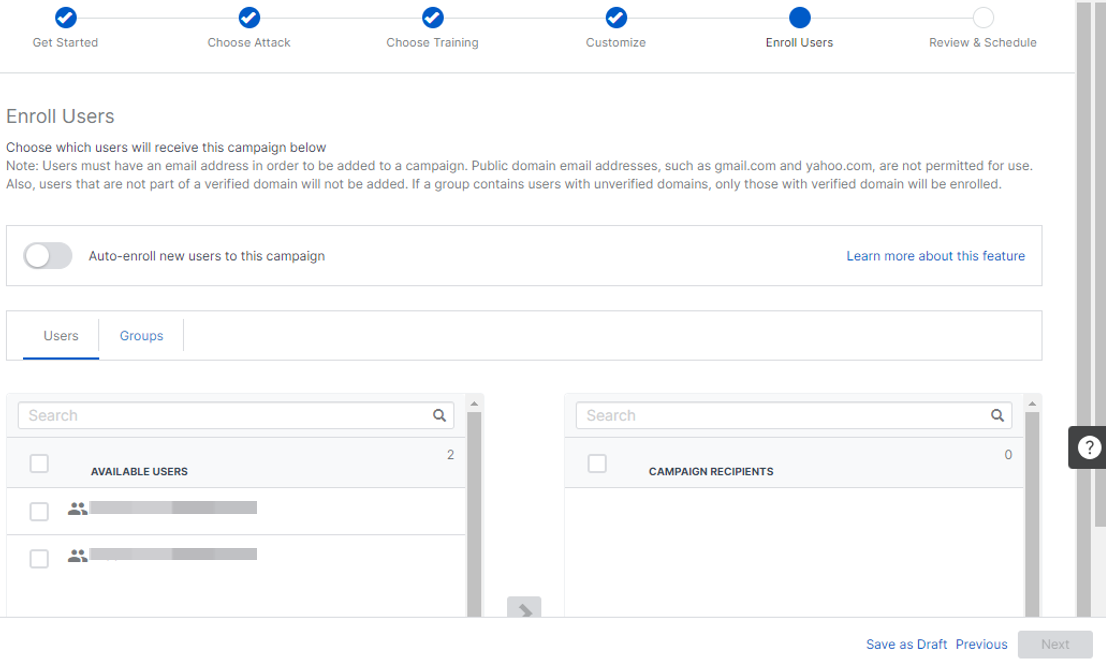
In Enroll Users, do as follows:
-
Select the Users or Groups to send the campaign to.
Note
You can't add users or groups with email addresses that use unverified domains. See Restrictions.
-
(Optional) Turn on Auto-enroll new users to this campaign to enroll new users into this campaign as you add them to Sophos Central. See Auto-enrollment.
- Click Next.
Note
To manage your users and groups, see People.
-
-
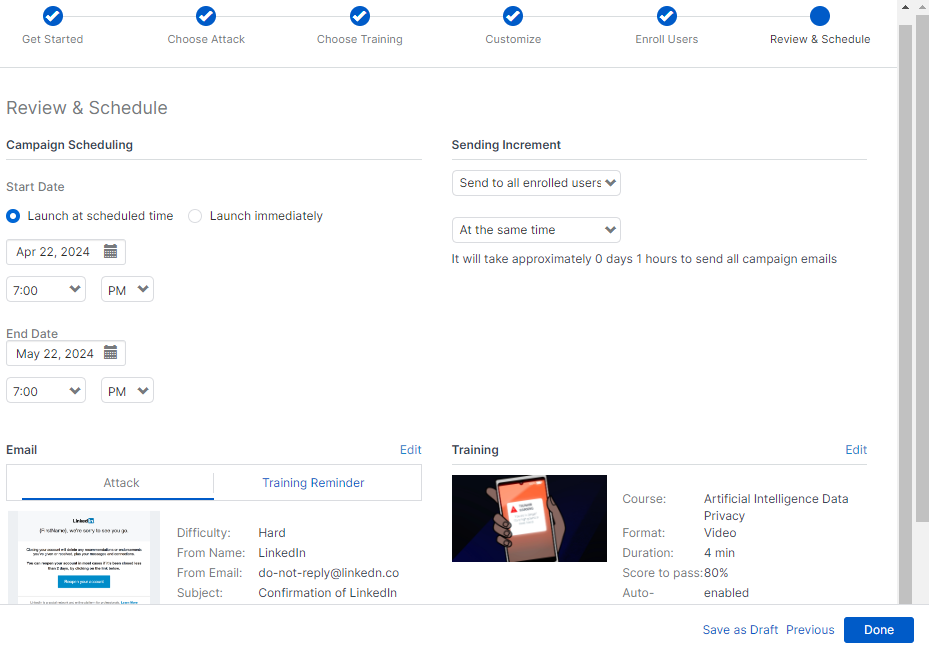
In Review & Schedule, do as follows:
- Review your selections from the previous steps.
- Schedule your campaign and set the Sending Increment.
For more details about scheduling your campaigns and sending increments, see Review & Schedule.
- Click Done to save the campaign.
Restrictions
You can only send simulated phishing emails to email addresses at domains you own. You must verify your domains with us before using them in Phish Threat campaigns.
- When you select Enroll Users, and some users' email addresses use unverified domains, you'll see a warning message.
- When you select Groups, and a group has a mix of verified and unverified domains in the email addresses, only the addresses with verified domains are added to the campaign. You'll see a warning message. You can verify the domains or continue with the addresses with verified domains.
Click Verify domains in the warning message to start verifying your domains. After verifying your domains, click Phish Threat to continue creating your campaign.
For more information on verifying domains, see Verify domains.