Installing Endpoint Protection using Jamf Pro
Restriction
You can only use these instructions for Macs with macOS 11 Big Sur or later installed. You can't use them for Macs with macOS 10.15 or earlier installed. This is because of changes in KEXT authorization requirements. See Security permissions on macOS.
You can install Endpoint Protection on your Macs using Jamf Pro. This means you can install our protection software remotely.
We provide a Configuration Profile. The profile sets appropriate authorizations for settings. These include the following:
- Full Disk Access
- system extensions
- notifications
These settings are required for Endpoint Protection to work correctly.
The latest macOS Endpoint Protection installer includes an updated Configuration Profile. This profile contains the settings needed to prevent users turning off Sophos Endpoint on Macs running macOS 13 Ventura.
These instructions are for JAMF Pro, however, the MDM profile and script should work in other MDM solutions.
This information is provided as-is and was created using Jamf Pro 10.40. Contact Sophos Professional Services if you require assistance with your specific environment.
To install Endpoint Protection on your Macs using Jamf Pro, do as follows:
- Download the installer from Sophos Central. You also need to copy the SophosInstall download URL.
- Save the configuration profile and installation script from the installer.
- Set up computer groups in Jamf Pro, if necessary.
- Add and assign a configuration profile in Jamf Pro.
- Create and configure script policies in Jamf Pro.
- Check that Endpoint Protection is installed.
Download installer
You need the macOS Endpoint Protection installer from Sophos Central. You also need the SophosInstall URL. You need this to use with the installation script.
To do this, do as follows:
- Sign in to Sophos Central.
- Go to Devices > Installers.
-
In Endpoint Protection, choose your installer.
- Click Download Complete macOS Installer to download an installer with all endpoint products your license covers.
-
Click Choose Components… to choose which products will be included in the installer.
For more help on downloading the installer see Endpoint Protection.
-
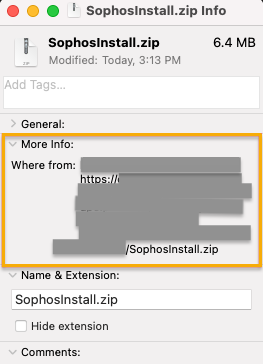
Save the download URL. To do this, do as follows:
- Right click the
SophosInstall.zipfolder and click Get Info. -
Under More Info, copy the URL shown in Where from.
If the URL isn't shown in Where from, do as follows:
- Right-click the
SophosInstall.zipfolder in your browser Downloads. -
Click Copy address.
This gives you the URL of the downloaded installer.
- Right-click the
-
Save the copied URL.
You need this to use with the installation script in Jamf Pro.
- Right click the
Save the configuration profile and installation script
Next, you need to save the configuration profile and installation script from the installer zip file.
To do this, do as follows:
- Find your downloaded installer zip file,
SophosInstall.zip. -
Extract the following files:
Sophos Endpoint.mobileconfigInstall Sophos Script.txt
-
Save these files.
Set up computer groups
You create groups using Jamf Pro to organize your Macs. You can use these groups to install Endpoint Protection remotely. You assign a configuration profile and installation script to groups to do this.
These instructions give a simple example of creating a group to get you started.
If you already have groups set up you can skip this section.
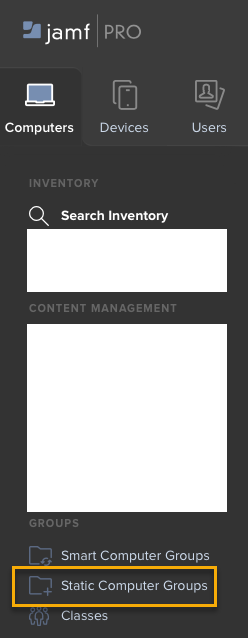
- Log in to Jamf Pro.
- Click Computers.
-
Click Static Computer Groups.
-
Click + New on the right.
This creates a new static computer group.
-
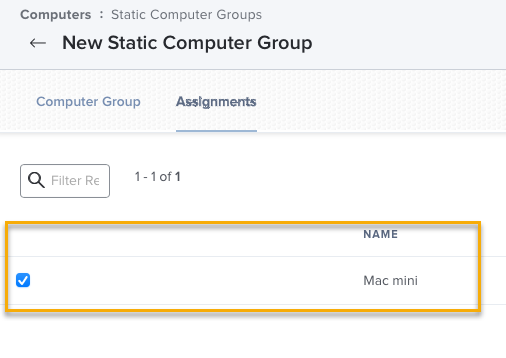
Enter a Display Name for the group. Click Assignments.
-
Select all the Macs you want to install Endpoint Protection on and click Save.
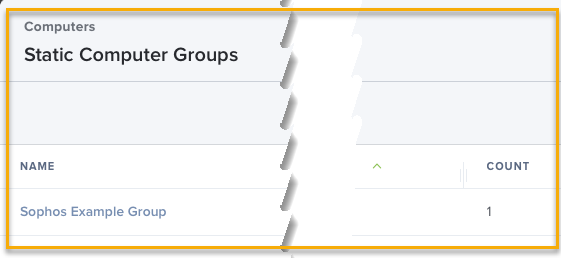
This creates a new static group.
-
Check you can see your new group in Static Computer Groups.
Add and assign configuration profiles
Restriction
You must have a group before you do this.
Now, you need to add and assign your configuration profile. This is the Sophos Endpoint.mobileconfig file you saved from the installer zip file, SophosInstall.zip.
Add profile
To add your profile, do as follows:
- In Jamf Pro, click Configuration Profiles.
- Click Upload.
-
Click Choose File and select
Sophos Endpoint.mobileconfig.This is the Sophos signed configuration profile.
-
Click Upload.
- When your upload is finished, click Scope.
Assign profile
Now you assign the profile to your Macs.
To do this, do as follows:
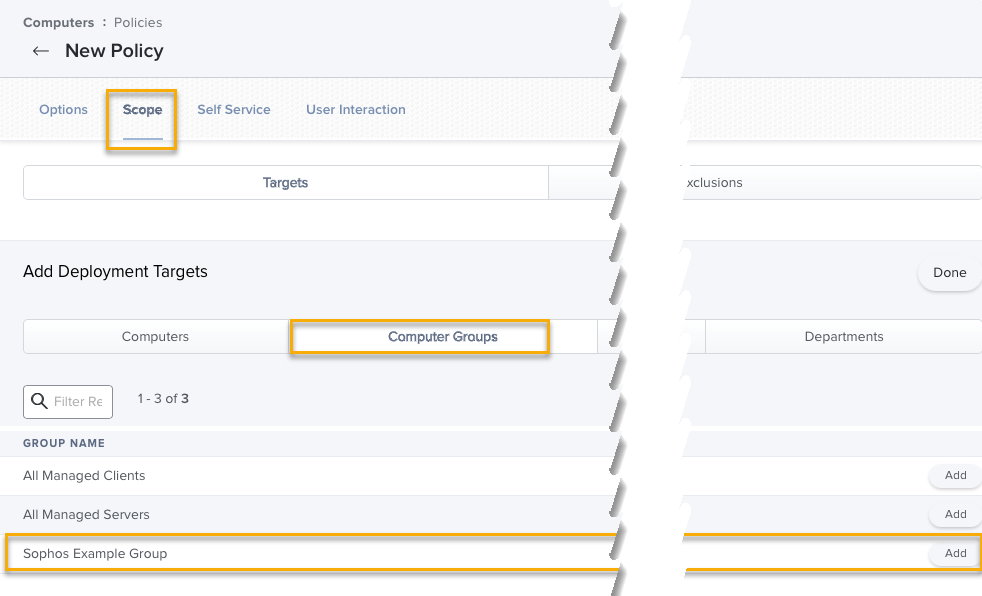
- Click + Add on the right.
- Click Computer Groups.
-
Find your groups. For each group you want to assign the profile to, click Add to the right of the group.
This screenshot shows an example target group.
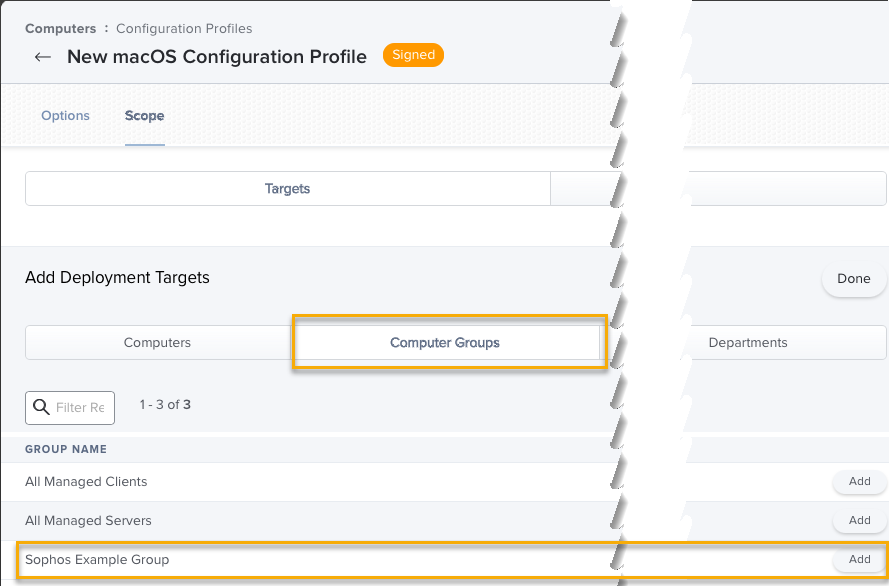
-
After you add your groups they disappear from the list. Click Save at the bottom of the page.
-
Click Configuration Profiles on the left menu.
You should see the Sophos Endpoint configuration profile assigned to your chosen groups.
Create and configure a script policy
Restriction
You must have a group before you do this.
Next, you need to create and assign the Sophos installation script to your target groups. You will use the Install Sophos Script.txt file you downloaded earlier. You will also need the installer download URL you copied earlier.
Create Sophos installation script
To create the script, do as follows:
-
In Jamf Pro, click the Settings icon (top right).

-
Click Computer Management.
- Click Scripts.
- Click New to add a new script.
-
Enter a Display Name.
-
Click Script.
- Set the Mode to Shell/Bash.
- Set the Theme to Default.
- Copy the contents of
Install Sophos Script.txtinto the script field. -
Replace
"put installer URL in these quotes"with the installer download URL you copied earlier.
-
Click Save.
For more information on the command-line options, see Installer command-line options for Mac.
Create policy
Next, you need to create a policy for your script and assign your script to it.
To do this, do as follows:
- Click Computers.
-
Click Policies.
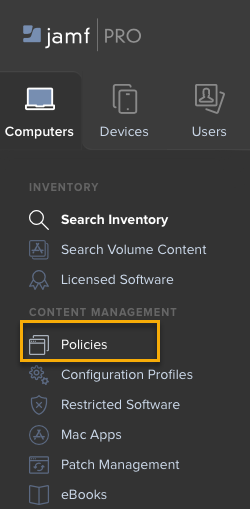
-
Click New.
- Enter a Display Name.
-
Select Recurring Check-in as the event that activates the policy.
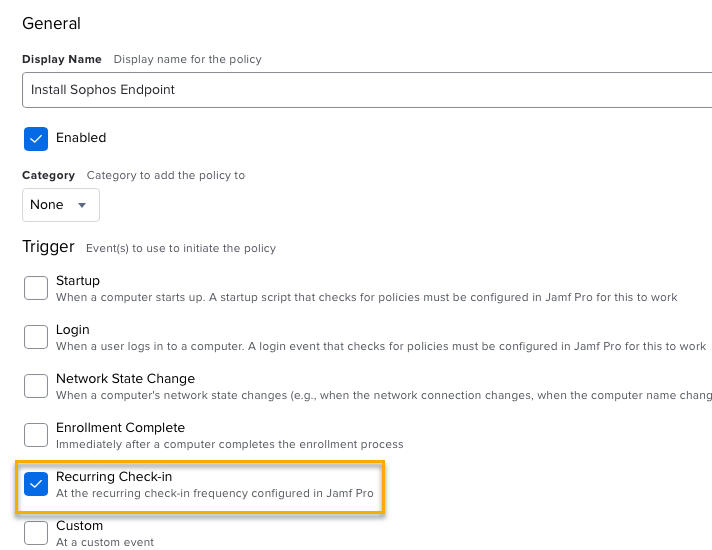
-
Click Scripts.
- Click Configure.
- Click Add and choose the script you added earlier.
- Click Scope to add your deployment targets.
- Click Add and then Computer Groups.
-
Find the group you created earlier and click Add (on the right).
-
Click Save.
Your policy activates the next time Jamf Pro detects your Macs. This then runs the Endpoint Protection installation on your Macs.
Check Endpoint Protection is installed
You can check the Jamf Pro log files to see your policy has activated. You can also verify that the installation has worked by checking your Macs.
To do this, do as follows:
- In Jamf Pro, click Computers.
- Click Policies.
- Click on the policy you created earlier.
-
Check the logs for the policy. You will see one of the following statuses for your groups:
- Pending: script hasn't run yet and installation hasn't happened yet.
- Completed: script has run and your Macs should now have Endpoint Protection installed on them.
-
Check that your managed Macs have Sophos Endpoint installed on them. On each Mac, check the following:
- In System Preferences check Profiles. You should see the name of the configuration profile you set up in Jamf Pro.
- In Sophos Endpoint, check the Endpoint Self Help tool. Any issues with installation or configuration are shown here.
For help on fixing permission issues, see Security permissions on macOS