Create query categories
You can create custom query categories in Live Discover.
This feature might not be available for all customers yet.
Custom categories let you group queries the way you want to. For example, you can put the queries you run most often into a new category.
You can put predefined Sophos queries or custom queries or a mix of both into a custom category.
Create a category
To create a category and add queries to it, do as follows:
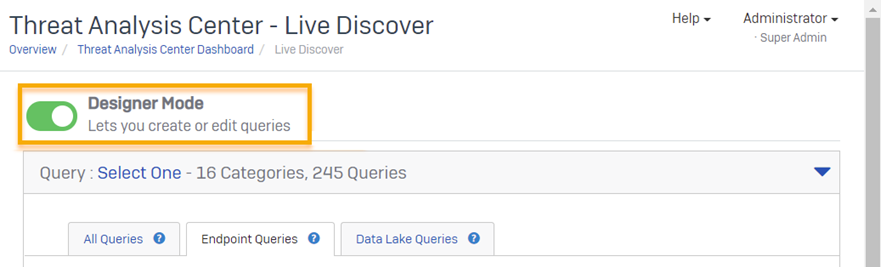
- Go to Threat Analysis Center and click Live Discover.
-
In Live Discover, turn on Designer Mode (if it isn't already on). This allows you to create and edit queries and to create new categories.
-
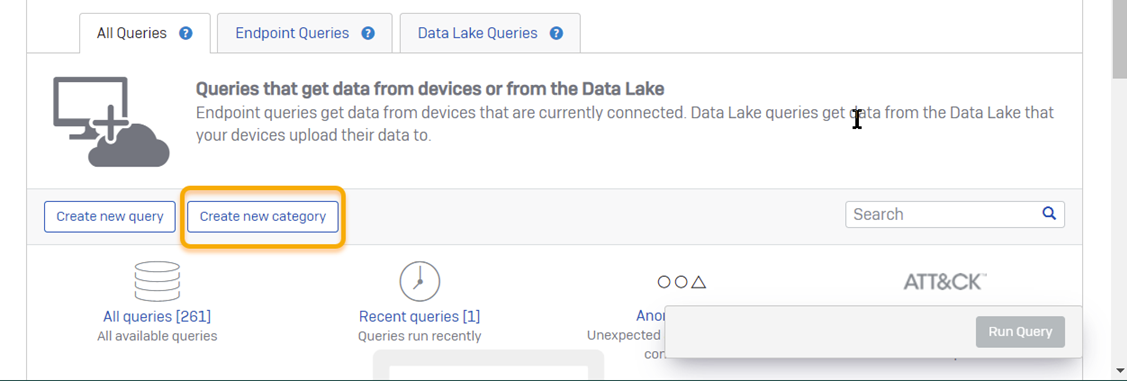
Click Create new category.
It doesn't matter which tab you're on. You can create a category from any of the tabs in Live Discover.
-
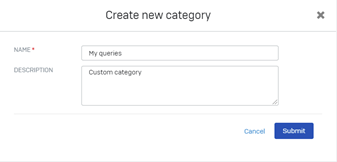
Give your category a name and description. Click Submit.
-
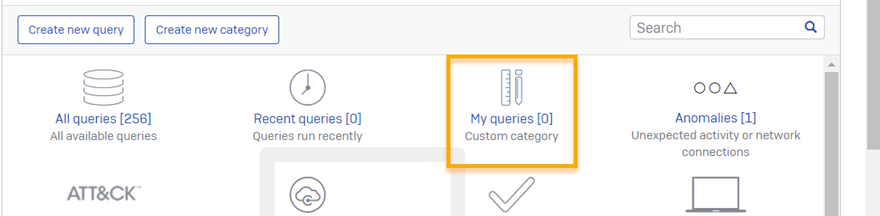
Check that the new category shows in Live Discover.
Custom categories are shown with a special icon.
-
Add queries to your category:
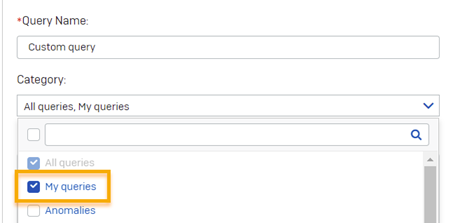
- To add a new query, click Create new query, and select your new category in the Category drop-down menu.
-
To add an existing query, open the query, click Edit, and edit the Category to add your new category.
If you add a predefined, Sophos query to your new category, you're asked to rename it.
Update a category
You can only update custom categories.
To update a category, do as follows.
- Go to Live Discover.
-
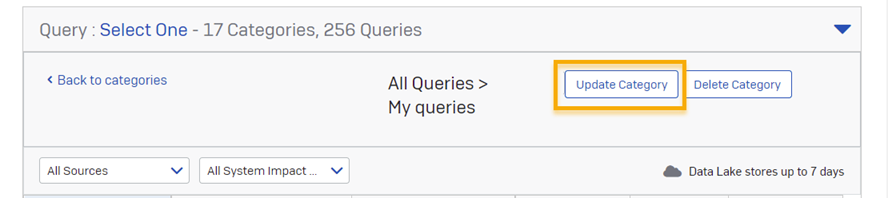
Click the category you want to update.
-
Click Update Category.
-
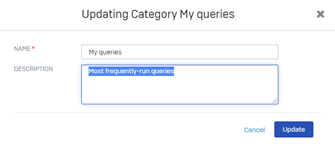
Change the name or description and click Save.
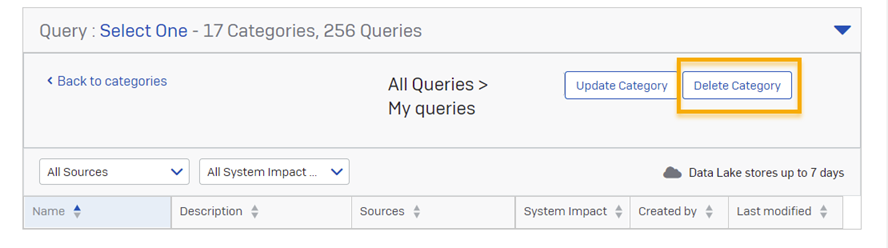
Delete a category
You can only delete custom categories.
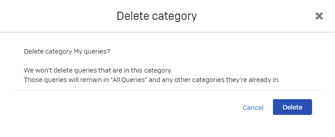
Deleting a category doesn’t delete the queries in it. Queries remain in All Queries and any other categories they’re in.
To delete a category, do as follows:
- Go to Live Discover.
- Click the category you want to delete.
-
Click Delete Category.
-
Click Delete to confirm that you want to delete the category.