Cases
Cases replace Investigations. Investigations will remain available for a time to let you finish investigations still in progress.
The Cases page groups together suspicious events reported by our Detections feature and helps you or the MDR team do forensic work on them and respond to them.
About cases
We create cases for you automatically. These focus on the detections that we recommend you investigate.
- We create a case when there's a high-risk detection if it hasn't already been included in a case on the same day.
- We add later detections to the case if they share the same detection type.
Cases can be based either on Sophos XDR detections or on Sophos MDR detections. You can make changes to XDR cases, but MDR cases are read-only.
You can also create your own cases. See Create cases.
Enable cases
Detections and Cases are based on data in the Sophos Data Lake.
If you're not already getting detections, you need to ensure that uploads of security data to the Data Lake are turned on.
The data can come from various Sophos products or third-party products.
For data from Sophos products, see Data Lake uploads. For data from third-party products, see Integrations.
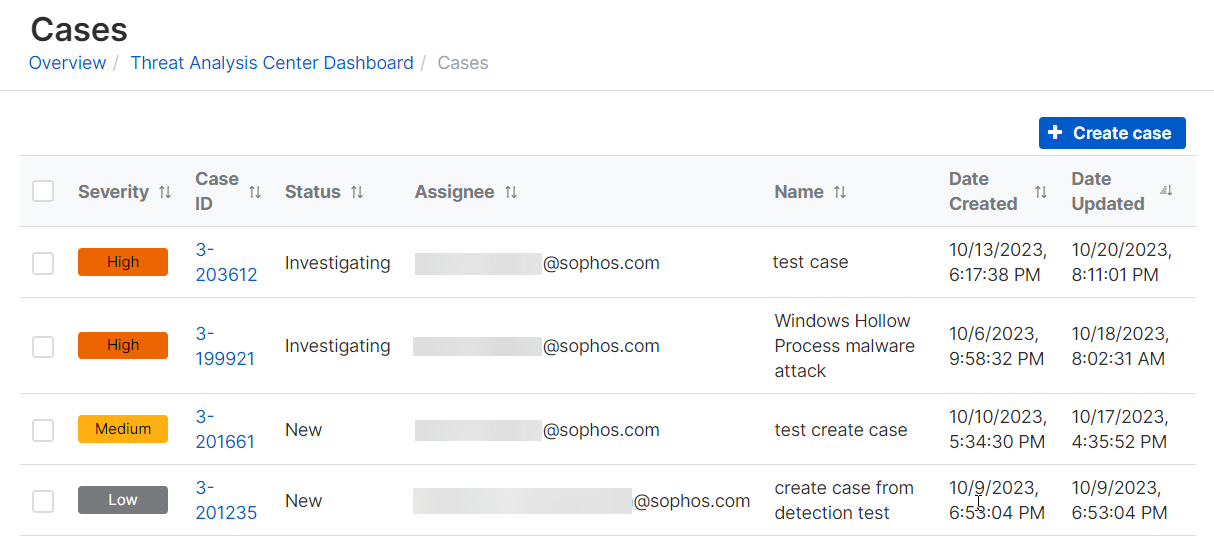
View cases
To view your cases, do as follows:
-
Go to Threat Analysis Center > Cases.
Note
The first time you view this page, the list might be empty. Come back later to see automatically-created cases, or create your own.
-
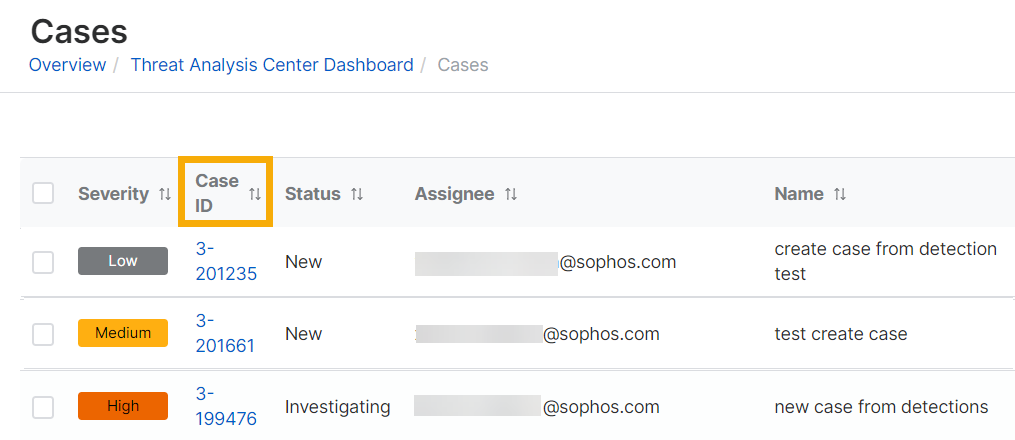
Click the Case ID next to a case to see its details.
You now see the Case details page. For more information, see See case details.
Edit and assign cases
You can only edit and assign XDR cases. Our MDR team processes the MDR cases.
You can edit cases and assign them to admins for analysis.
Partner Super Admins and Enterprise Super Admins can't edit and assign cases.
To edit and assign cases, do as follows:
- Go to Threat Analysis Center > Cases to see a list of cases.
- Click the Case ID next to a case to see its details.
-
In the Case details page, the Overview tab is open by default. Do as follows:
-
In Owner, select the administrator you want to assign the case to.
You must select an owner before you can set the priority and status of the case.
-
Set the Priority to Critical, High, Medium, Low, or Info.
- Change the Status from New to Investigating, if you're ready to start.
- In Summary, enter a description of the case.
-
We'll add related detections to the case as they occur.
Note
We notify Sophos Central admins about new cases if you set up email notifications for them. See Email notifications.
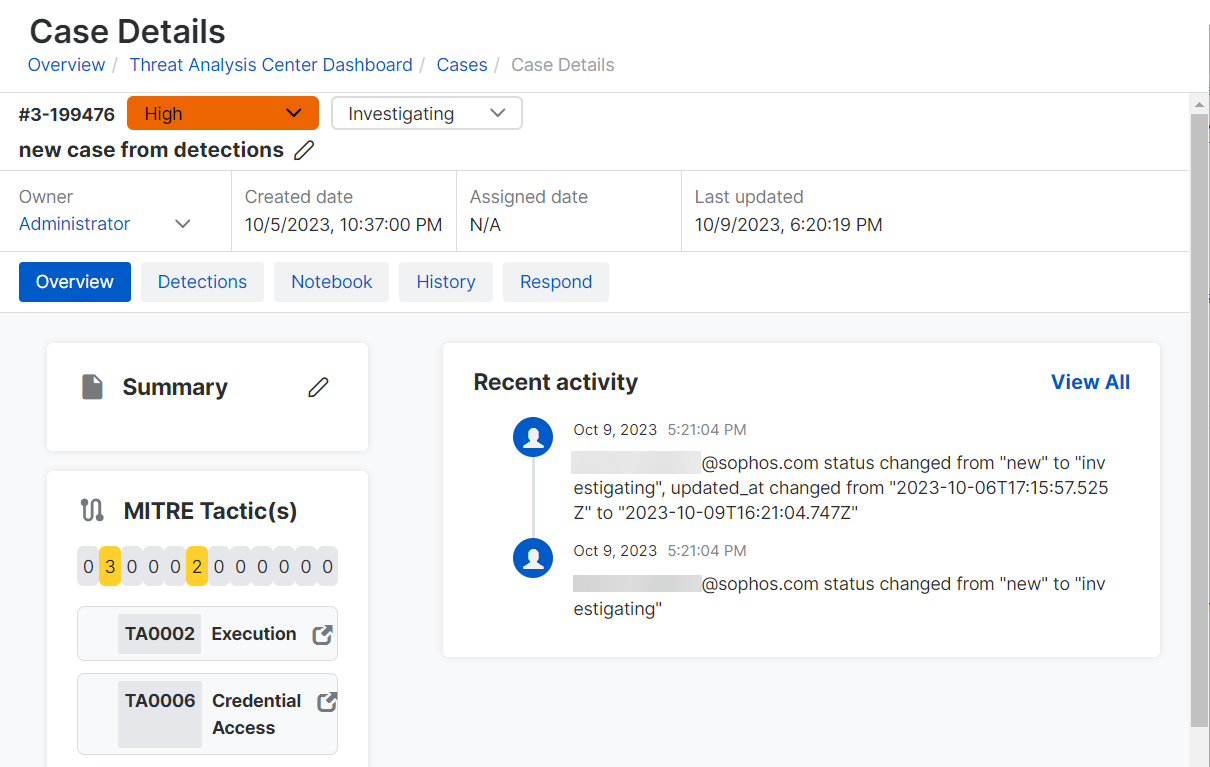
See case details
To see the full details of a case, click the Case ID next to it.
The Case details page header shows the severity, status, and owner of the case. It also shows when the case was created, assigned, and last updated.
The page also has tabs for further details.
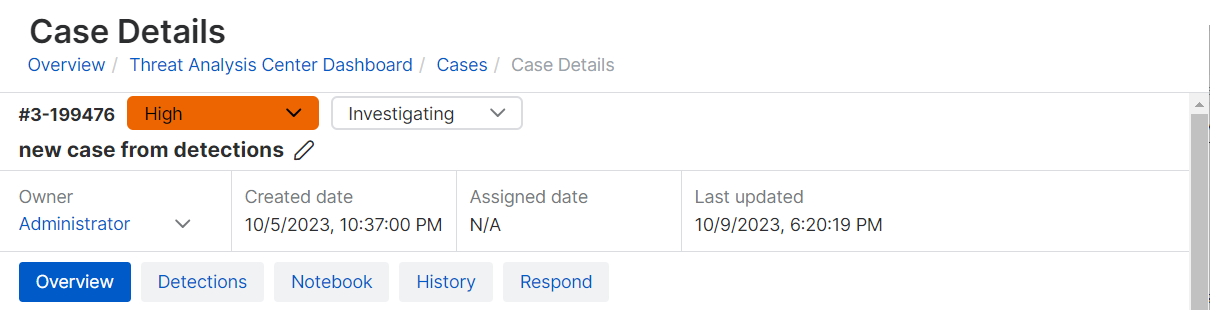
Overview tab
The Overview tab is open by default and shows a case summary, MITRE tactic details, and recent activity.
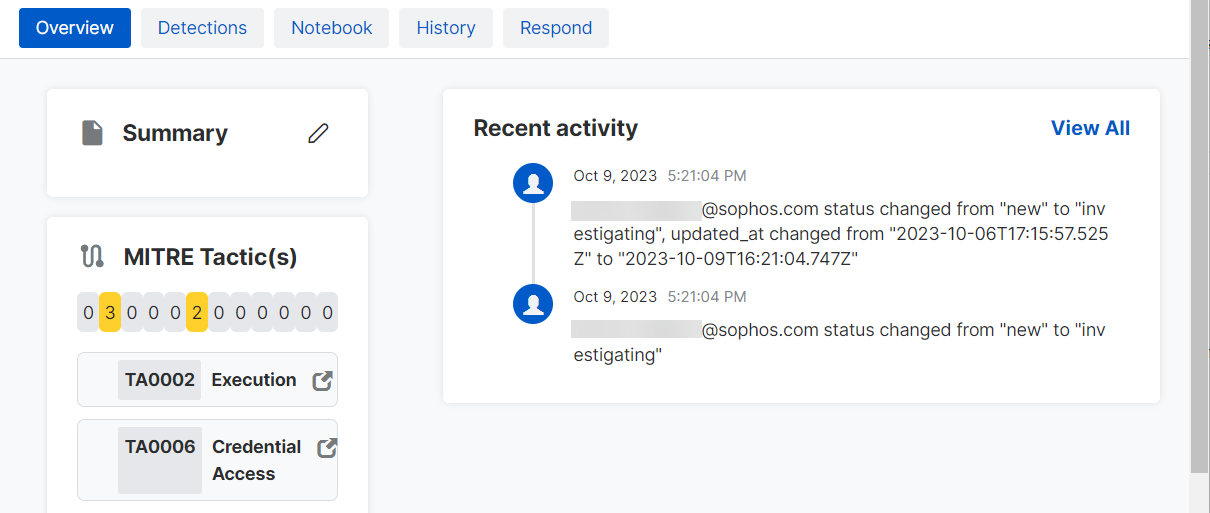
Summary
If you're an XDR customer, enter your case description. If you're an MDR customer, the MDR team enters a description for you.
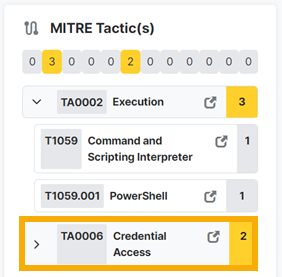
MITRE tactics
MITRE tactics lists any MITRE ATT&CK tactics and techniques we detected.
Click the fold-out arrow beside a tactic to see the technique.
Click the link beside any tactic or technique, for example Credential Access, to go to its details on the MITRE website.
Recent activity
Recent activity shows recent changes to the case. Click See all to go to the History tab.
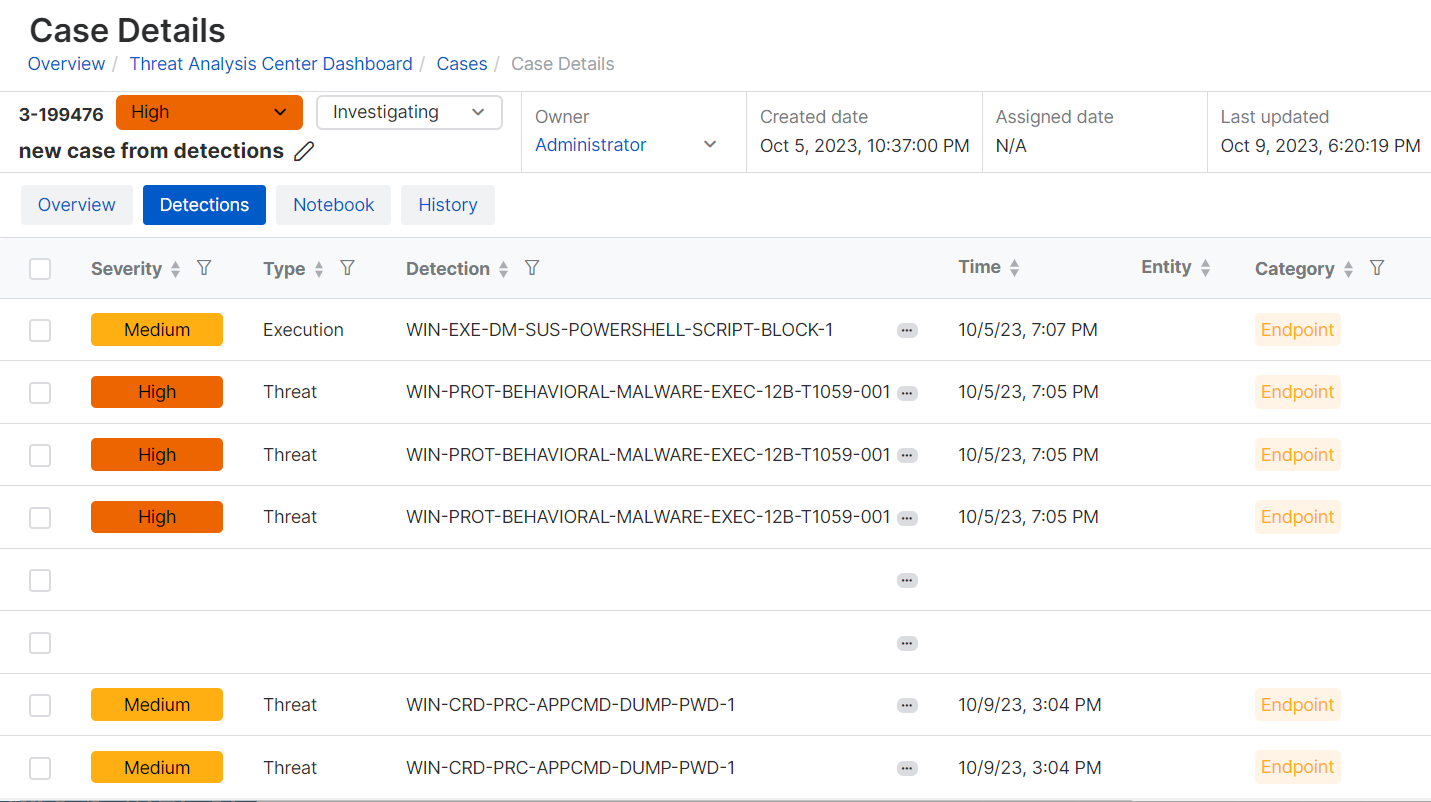
Detections tab
The Detections tab lists all the detections included in the case. It shows the same details as the list on the Detections page. See Detections.
Notebook tab
Use the Notebook tab to keep a record of your investigations.
History tab
The History tab shows the history of all the activity on that case. For example, detections added, or changes in status, owner, and so on.
Investigate cases
In Case details, use the Notebook tab to record your investigation into the case. We suggest you follow these steps:
- Decide whether you need to investigate or close the investigation.
- Check the external and internal connections used in the event.
- Check which devices and users were affected.
- Find out the attack tactics and techniques used. You can see these in the detection details.
- Use the pivot options in the detections to run queries on the data or consult third-party threat analysis websites. See Use pivot queries, enrichments, and actions.
Respond to cases
You can resolve detected issues via third-party products.
To use this feature, you must set up a Response Action integration with the third-party product you want to use. Go to Integrations and click your product.
Our example shows how to use a response action to suspend a compromised user. To take action, do as follows.
- Click the Case ID next to a case to see its details.
- Select the Respond tab.
-
Find the action you want. Click the product type Identity to see actions available for that type.
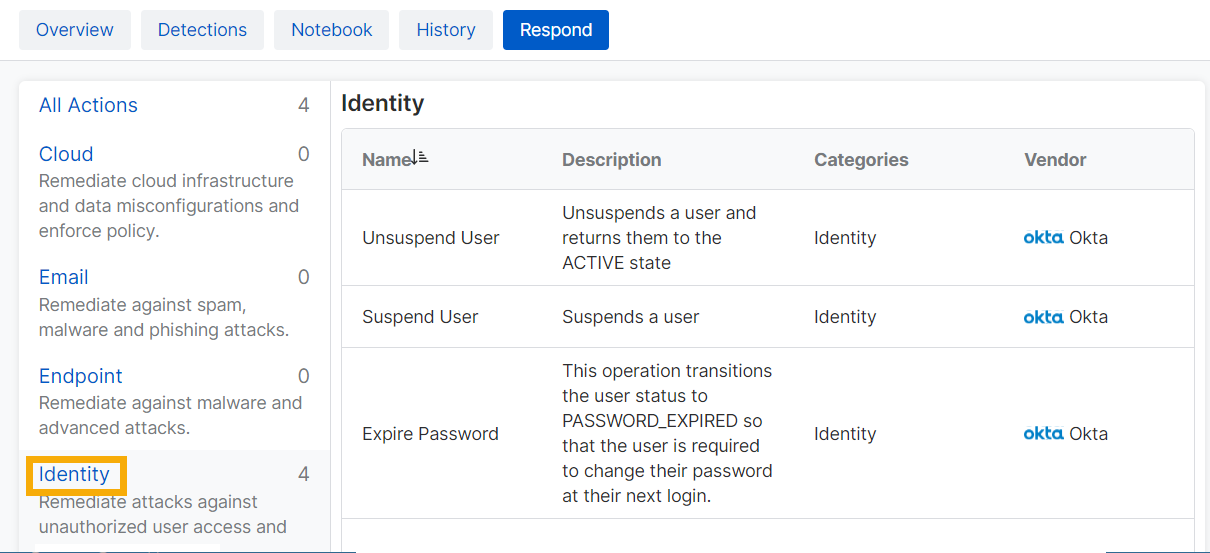
-
Click the action Suspend User.
-
In the action's details page, enter the required information and a reason for the action.
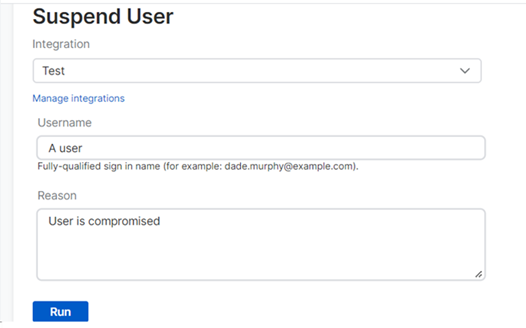
-
Click Run.
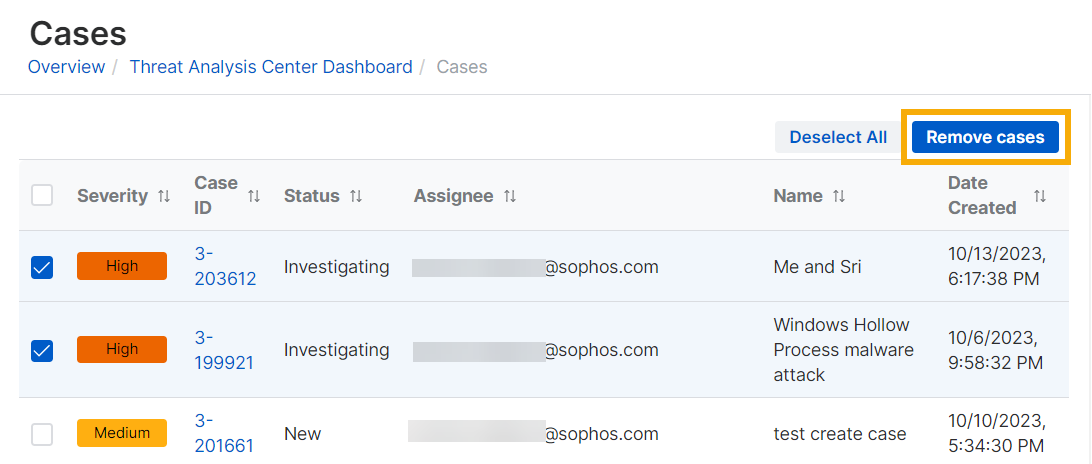
Close or remove cases
To close a case, change the status to Closed. The case remains in the list for 30 days and then we delete it.
Partner Super Admins and Enterprise Super Admins can't close or remove cases.
To remove a case from the list, select it, and click Remove cases.